How to upload/download files between your computer and WordPress website using FTP software.
FTP is short for File Transfer Protocol. As the name suggests, FTP is a means for transferring files between computers with one of the computers serving as a server. FTP maintains a connection between the computer and the server. FTP helps to transfer files from a computer to a server in a safe and faster way.
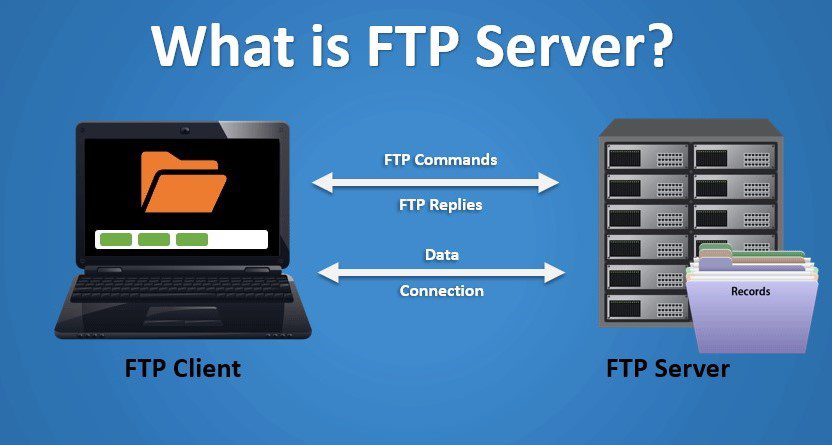
You use a software package called an FTP client to connect to your website’s FTP server. Once the connection has been made, you can access the files on your website and upload files from your computer.
You first need to download an FTP client, a software used to established connection to your website’s FTP server. After ensuring that a connection has occurred, you can then access the files on your website or upload files to the website.
Why use an FTP software?
Files on your website can be accessed using the File Manager of your web hosting. So why do you need an FTP software to upload or edit files on the website.
Advantages of using an FTP client or software
Before we proceed, let’s familiarize ourselves with some of the benefits of using an FTP client or software.
Using an FTP ensures secured transfer of files, gives you control over your data, helps you transfer large size files, helps you to recover should you run into data corruption etc.
There may be times where you will run into problems with your WordPress website such that the admin dashboard may not be accessible. FTP can be used to access files on your website even if you are experiencing problems on your WordPress website. With it, you can upload downloaded plugins to your website or delete a file.
Which FTP software should I choose and why?
There are a number of FTP softwares. These include WinSCP, CoreFTP LE, CuteFTP, Cyberduck, FileZilla, gFTP, Nautilus, Transmit etc
The free and popular ones are the WinSCP which is designed for the Windows platform, Cyberduck for Mac OS and FileZilla, which is a cross-platform FTP software. Note that there may be Pro versions for these softwares. Get a free version.
In this article, we will stick to the more generic one, FileZilla to upload files. You should be able to use any of the others by following the steps as they are essentially similar. If you have not downloaded FileZilla already, click the button below to download now.
Connect to your WordPress website using FileZilla
An FTP client needs a username and password before you can connect to your cPanel. Just as you are required to enter your hosting username and password or cPanel details before you can access your hosting account dashboard, FTP clients need your cPanel details before they can unlock your cPanel. Your FTP details are sent to you by your hosting company in an email. You may want to check your email for it or contact your hosting provider.
Step 1: Open FileZilla
Step 2: Click File >> Site Manager
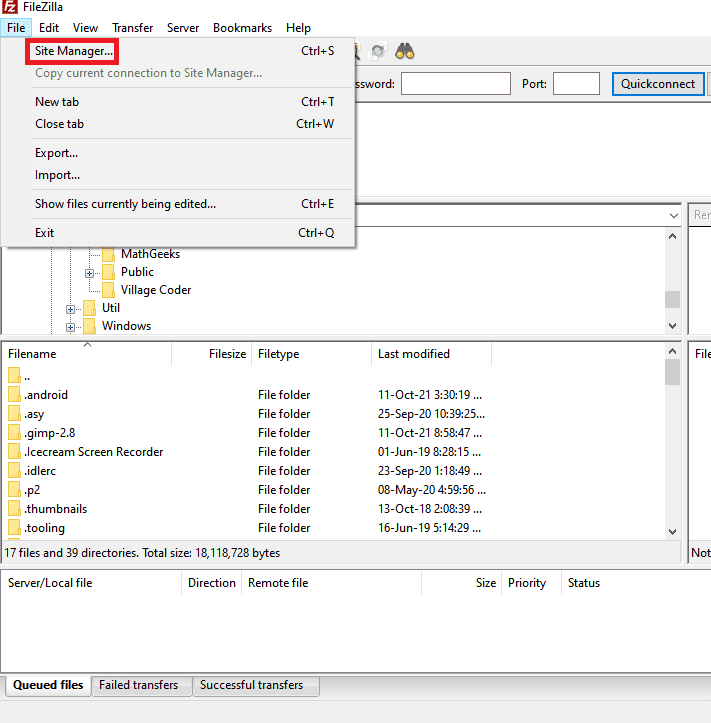
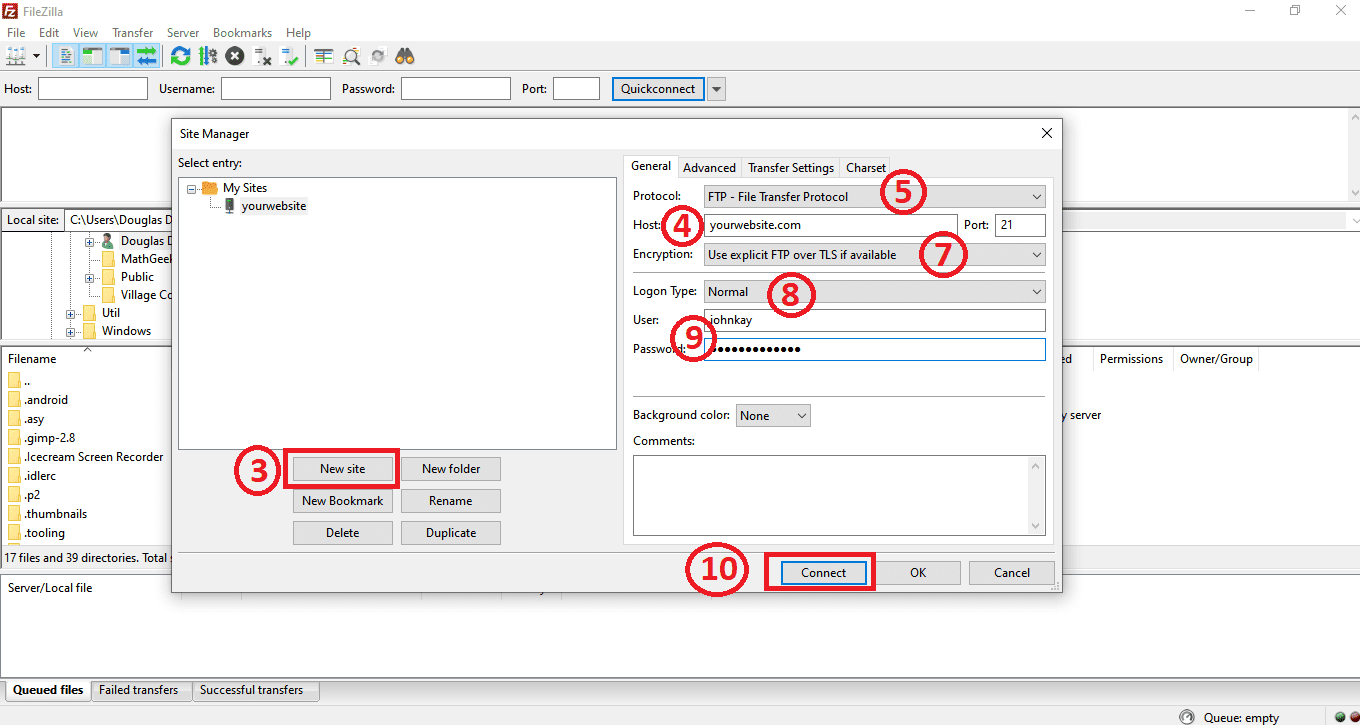
Step 3: click New Site to enter title for your website.
Step 4: Enter your domain name in the text filed designated Host.
Step 5: For Protocol, select FTP – Tansfrer Protocol. You would want to selet SFTP if your hosting provider supports it.
Step 6: The default port for an FTP is 21. Type 21 in the port textfield
Step 7: Select encryption type: use explicit FTP over TLS if available
Step 8: Set logon type to Normal
Step 9: Type your username. Note that this is the name you use to login into your cPanel. This is not the same as the login details for your host account. There is a username and password to log into his dashboard and a different set to log into his cPanel. The details used to log into the cPanel are sent to your by your hosting provider in an email. Contact your hosting provider for these details if you don’t remember and if necessary, change the password to something you can easily remember the next time.
Step 10: After entering all details, click connect to connect to the server
When FTP connects to the server
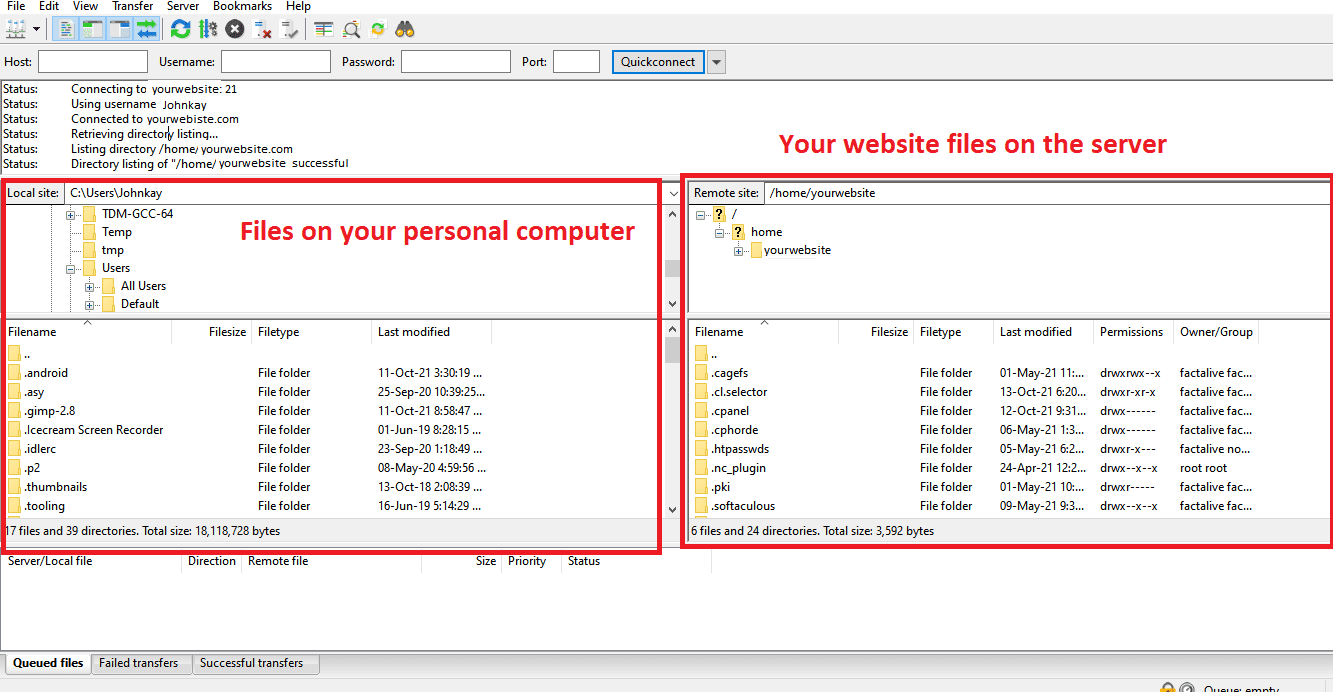
The above image shows a layout for the FileZilla after connection. The left column shows files on your personal computer. The right column shows files stored on your website’s server remotely. You can upload files from your personal computer (left) to your website (right). In the same vein, you can dowloand files from your website (right) to your personal or local computer (left).
First time connecting to FileZilla on your computer
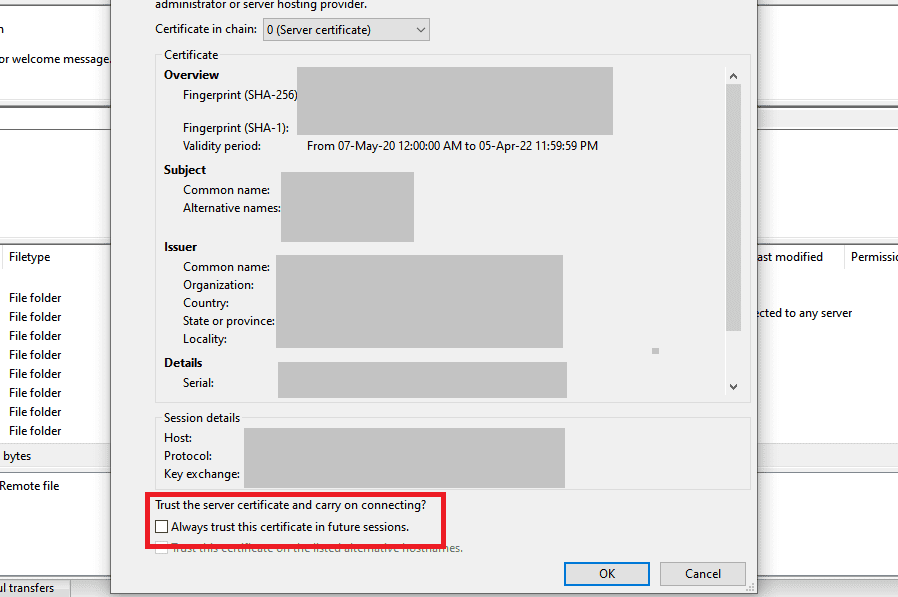
You will get a certificate notifying you that the connection is untrusted. Click the check box that says that certificate is to be trusted and hence connection should go on.
Experiencing connection problems
A couple of things might be hampering a connection. First, try to change your port from 21 to 22 and try again. You may also want to temporarily deactivate your firewall and antivirus if server connection is continuously rejected. Switch to a SFTP protocol if FTP is giving you a hard time. In my case, I had to switch to STFP and was given the port code 21098 by my hosting provider. It immediately got connected. You may want to consult your hosting provider for assistance if you still find problems.
How to upload files from your personal computer (left) to your WordPress website (right)
Let’s try to upload somethig from our personal or local computer to our website. Create a simple notepad file and place it on your desktop so that you can easily navigate to it and upload it. You may want to use any other file at any directory if you wish.
Now, navigate within the local site’s box to the directory of your file. This is done in the area labeled window 1. This will show in the bigger box beneath the first. This is labeled in the image as window 2.
Right-click on the test file in the window 2. Choose Upload to upload the file to your website. You have to make sure that you have navigated to the precise folder you want to place the uploaded file. This can be done by locating the folder in window 4 after navigating in the window 3. Double-click on the folder to open it before uploading the file. The uploaded file goes straight into the current directory.
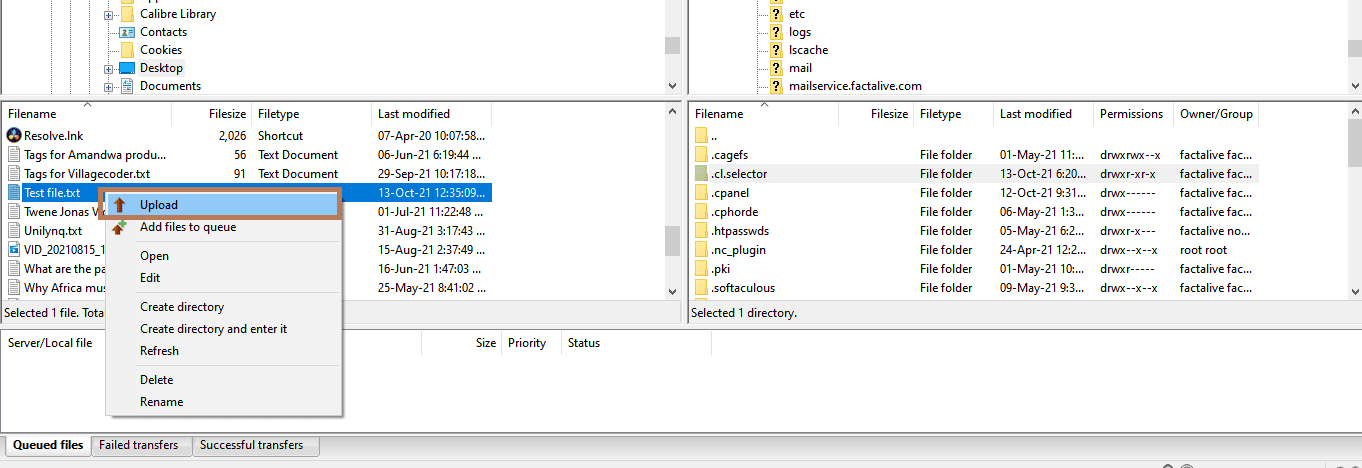
The file Test file.txt is uploaded from the local computer to your WordPress website.
Although it is possible to just drag and drop files from the local computer to your website and vice versa, it is not a good practice. You stand the risk of accidentally dropping a file in a the wrong folder. Always, try to right-click and choose upload from the menu.
Uploading a plugin to your WordPress website
One advantage of using an FTP is your ability to access your website files even if you find trouble loggin into your dashboard. We will demonstrate how to upload a downloaded plugin into our WordPress website.
Step 1: Download the plugin and unzip it. You will find a folder containing the plugin.
Step 2: In the left column on your FTP, that is on your local computer, navigate to the folder containing the plugin
Step 3: In the right column of your FTP layout, navigate to the foler called plugins. This normally has the path ending public_html/wp-content/plugins. It is in the plugins folder that we want to upload our plugin so it is important that you double-click this folder to open it to receive the yet-to-be uploaded plugin.
Step 4: Right-click on the plugin in the left column and select Upload

FileZilla will take some time to upload the plugin. After uploading, you have to go to your WordPress dashboard to activate the plugin.

How to download files from your WordPress website (right) to your personal computer (left).
Step 1: Navigate to the file you want to download in the remote server in the right column
Step 2: Right-click on the file or folder and select Download from the menu. The file will be transferred to the current directory in the left column.

You should now find the downloaded file in the current directory in the left column.
